Showing posts with label Cakes N' Cupcakes. Show all posts

Wednesday, January 02, 2019

✿´•*¨*•.¸¸❥ Vanilla Chocolate Swirl CupCakes ✿´•*¨*•.¸¸❥


N3 kali ni sy tunjukkan cara2 membuat sponge cupcakes using the sponge mix ready yg boleh dibeli di kedai2 bakery supplier ya, sy pilih optima type tuk lebih gebu ... ada yg cik min guna pic sebelum ni sbb sy x snap all the steps .. byk skip .....

Dah lama x baking skills mmg dah lari dan bterabur ...Swirl pun x cantik mana ..huhu ...... Ok jom layan ...InsyaAllah ada manfaatya ...Dan semoga all mommies outta pndi masak ...anak hepi cik somi pun poja-poji dan PJK (perut jalan ke depan) kot lg nnt ...


Kita mulakan dengan membuat cupcakes :-


Bahan2nya :
--------------
  • ✿´• 250 gm sponge mix (vanilla/chocolate or any flavour as u desire)
  • ✿´• 5 biji telur gred A
  • ✿´• 60ml air masak suhu sederhana (if nak letak perasa like pandan, put with this boiled water)
  • ✿´• 60ml corn oil or butter - i used butter, melted
  • ✿´• 1/2 tsp ovelette
  • ✿´• 1 tsp bicarbonat soda
  • ✿´• 1 tsp baking powder
  • ✿´• 1 tsp vanilla essence


Method  to bake !
--------------------------
  • ✿´• Pic 1 - Pastikan mixer and mixer bowl bersih dr segala kekotoran dan grease sbb akan mempengaruhi 'kegebuan' telur yang akan dipukul nnt.


  • ✿´• Pic 2 - Pukul telur sampai betul2 kembang (this will takes approximately 15 minutes if using my mixer ! but depends on the mixer jugak - lau ada turbo power lg cepat kot). 
  • ✿´• MeanWhile, boleh sukat dan ayakkan sponge mix, tuk 5 biji telur sy sukat 250gm tepung, kalau nk buat sikit just guna 3-4 eggs and then 125gm tepung sponge mix jek ..itu lah ratio nya yg selalu sy buat
  • ✿´• Bahan2 dicampur bersama spongemix yg ialah baking powder 1 sdk + baking soda 1sdk + icing sugar 2-3 sudu besar. All sifted dan kemudian tgk step bawah ni ...
  • ✿´• Pic 3 - Lepas tu masukkan sponge mix sikit2 sampai habis ...Masukkan ovalette. Pukul lagik another 15 minutes (Trust me! ..I've been tried out for 8mins, 10mins and 15 mins gives me the BEST RESULT though !!, This is by my own experience ok to get the very very delicate status/stage) ..nk reach gebuz gebaz stage. MeanWhile boleh cairkan butter, cara double boiler or panaskan in microwave jek.


  • ✿´• Pic 4 - Masuk air panas (boiled water, if nak letak perasa like pandan, put bersama this air) sikit2. Masukkan oil or mentega cair, pukul lagik sampai jadi mcm ice cream peak for another 15 mins, jenuh menunggu but worth it when you saw the 'spongy and springy' sponge cake, we called it Ribbon like stage or Ice Cream peak ! 
  • ✿´• If not mmg kita takkan dapat bakerynya level of softness and smoothness ... lau x spongy baik buat kek coklat lembab ye x??
  • ✿´• Pic 5 - Perasakan dengan vanilla essence nak bg wangi-wangian ..eh cistat pun nk pki perfume tau !


it should be looks like this for the FINALE stage !


  • ✿´• Pic 6 - Sy bahagikan adunan kepada 2 - Chocolate & Vanilla flavour ...uols boleh buat perasa & pewarna kegemaran ...nk buat 7 pun sokay !! ...rainbow la sgt kan ? ...tp sokay jek, sweeettttt :-)

  • ✿´• Pic 7 - Curahkan perasa vanilla ke dalam cupcake mould. Sy gunakan cawan cupcakes keras sbb xde dulang muffin yg lubang2 tu kan. Selang-selikan dengan pewarna coklat... Pic mcm kat atas ya :-
 

  • ✿´• Pic 9  - Right after bake, tunggu sejuk sebentar before apply the whipping cream, otherwise whipnya cair gitu .. Sejukkan atas wire rack :)

  • ✿´• Pic 10 - Pukul Whipping Cream sehingga naik dan warnakan pink conconeal (err adess cam mn spellingnya) aka pink dan kuning telur. Combine both dan masukkan ke dalam bag piping.

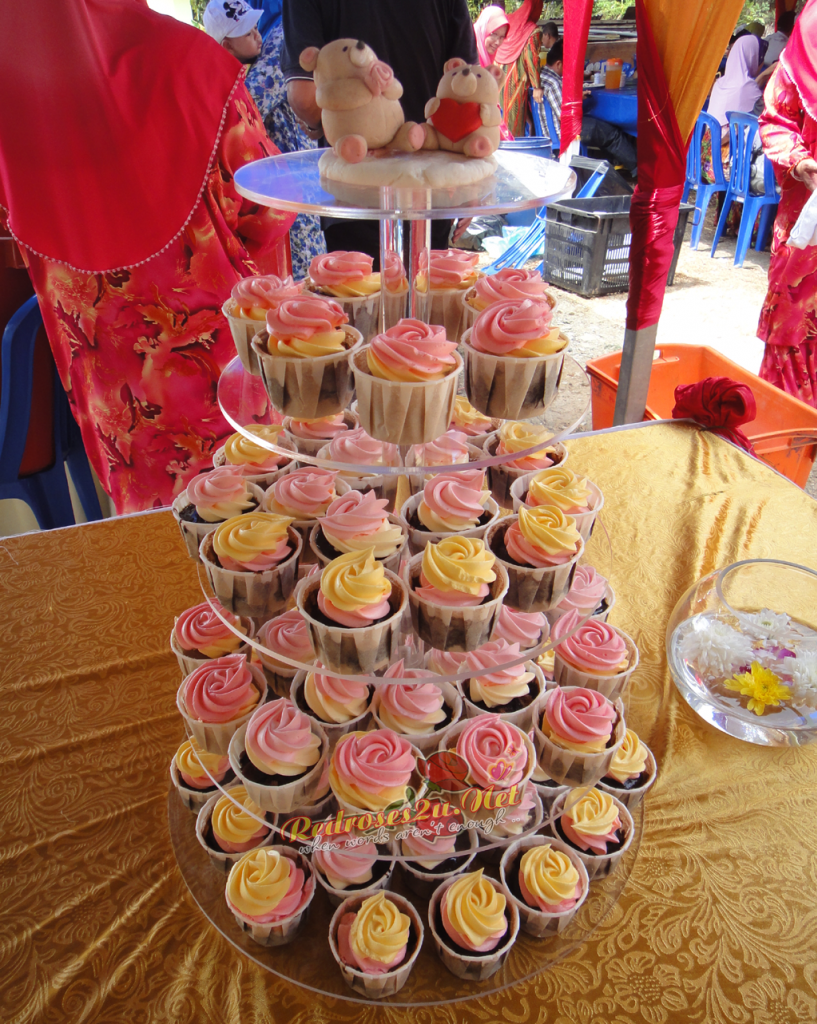
  • ✿´• Pic 11 - Uols boleh tengok video ni cara2 membuat swirl ya. Nak explain x pandai la mokcik ..hehehe, from Emma's Sweets.


  • ✿´• Pic 12 - Ok da siap .. boleh la di'ngap' ya ...More details on sponge cake boleh refer N3 kat sini ya.


*~~ Selamat Mencuba dan Semoga Bermanfaat ~~*


Thursday, December 05, 2013

╰⊰✿´•*¨*•.¸¸❥¸ Just For Fun Cuppies for ESDS ╰⊰✿´•*¨*•.¸¸❥¸

Ku gagahi jua membuat cuppies ni malam tadi, even in the midst of working days, sekali tengok clock dah 11.45PM huhuhu ..... sbb dah lama bebenor x make cuppies for 'my theraphy' session ..heheh ..sbb ke'bz'an terlampau ngan  kerja and out station je sokmo .....mcm penat je, mcm bz je !!

Sebahagian dari off-mate, x larat nak buat nama everybody unless weekend byk masa then boleh la ngadap cuppies design for the whole day .... jadi la untuk my blog photo session ...sebab rindu sangat nak buat N3 pasal cooking ...

cara2 buat Rosette - http://www.youtube.com/watch?v=8cvyBz2a4DY
buat sponge cake - Joy of Baking
buat huruf - Brand Windsor Clikstix

semoga video dia atas membantu ....


 BFF forever merangkap SOUL-MATE 4eva dunia akhirat (selain suami masing2 la heheh) InsyaAllah ... :D


ESDS is the name of out dept - Enterprise System Development & Support...."ESDS always in the heart" agaknya tahun depan nama baru kot ..


Tuesday, March 12, 2013

╰⊰✿´•*¨*•.¸¸❥¸ My First Fondant Wedding Cake ...╰⊰✿´•*¨*•.¸¸❥¸


'SELAMAT PENGANTIN BARU' sy put all around cake to cover the surround fondant yg x seberapa nak kemas ...


This doll looks awesome atas cake ...dah la kiut miut somemore ...Wish pihak sana could return me this dolls ..huhuhu ...


Cake dalam kotak hantaran ...Kerana cake was too small i've decided nk put cupcakes all around ...cover line sbb my 1 kg cake dah comot due the fondant dah mess up with with chocolate ...aduiii mcm2 la ...


My cake dalam kotak hantaran ...dah lain plak the design ..heheh


Hantaran dari pihak pompusn ...lelakinya nanti i upload kan ...


Inilah my cupcake yang x seberapa ...plan asal nak buat riban2 tp ni je yg dapat ..Syukur la Alhamdulillah ...Plus dapat jugak i merasmikan my cupcake tier yg dibeli 2 thn lalu kot ...wow ..rasa mcm berbunga je perasaan ni  ...
 
Akhirnya dapat jugak digunakan Couple Bear ni ...Dah lama terperuk dalam freezer dah nak kulapuk + fungi dah ni ...heheh ..


Zooming sat ...my mistake x guna cup yg kiut sikit ....xpe, point to remember for the next time :D


Pelamin yang dihias indah, merah & gold concept ...
 

My HB shake hand ngan Tok Kadi ...perasan nikah lagik ler tu, uwek !! ...No la, this is akad sbb mewalikan hakim for his sis (pengnatin bj putih) ...baru tau ada akad jugak for mewalikan... good good new experience ni ...baru tahu ....


Lastly for Adila and Fazli ...


Barakallah ! 
Selamat membina rumahtangga yang barakah, mawaddah wa rahmah ...
Semoga Allah menghimpunkan yang terserak dari keduanya,
memberkati mereka berdua dan kiranya Allah meningkatkan darjat
keturunan mereka menjadi pembuka rahmat,
sumber ilmu dan hikmah serta pemberi rasa aman bagi umat ...


Amin Ya Rabbal A'lamin ..

Sunday, December 04, 2011

❥❥ Roses Vertical Layer Cake Tutorial ❥❥

Vertical Layer Cake Tutorial

see another alternatives - Checkers Cake


I really need to preface this tutorial with… I am sorry. I am SURE there are easier ways to do a Vertical Layer Cake.

Verticallayercake

But I was being a brat for my birthday.

I wanted real cake, and not sponge cake.

I wanted two different flavors. (that might be a pregnancy thing)

I wanted massive amounts of frosting.(that might be a pregnancy thing too)

Hence, I bucked every traditional mold I had seen for a vertical layer cake and made my own.

Sorry.


Verticalcake2

The second time making the cake I was surprised by how quickly everything went. Its amazing how much smoother life is with a plan.

Huh. I gotta remember that.

Anywho… I made two cakes. One red velvet and one white cake. I made them in 8in pans and used these methods for creating a level cake.

Here is an important step… IMMEDIATELY out of the oven, like say within five minutes at most, I removed the cakes from their pans and cut of the top crusty layer of cake of both 8in cakes.

I then placed the cut parts together. (It should look like a two layer cake here, except without frosting) Then put it in the freezer for no less then five hours.

The reason I do this is:

1. I want the height of a two layer cake. (four or five inches)

2. I do not want a frosting seam.

3. This helps to meld the layers together so they appear one complete layer.

If you have a 5in deep cake pan and can successfully bake a 5in cake then just do that! (lots easier BTW)

Now! Once the cakes have firmed up nicely (after a good five hours, but give it six if you can!) you can remove them from the freezer.

We will begin to cut out our layers!

I simply used a cardboard cake round as my guide. I traced out three evenly (ha! I am so not a perfectionist, so bear with me) spaced concentric circles.

IMG_9242.cake

I am now going to cut off the outside circle.


IMG_9245.cake

Place the template back on the cake. Now I need to carve around that circle! Its important to try and get your knife at a 90 degree angle… you want a very straight up and down cut.


IMG_9252.cake

Follow the template as close as you can. A sharp knife here is a great idea!!


IMG_9255.cake

You are going to do this with BOTH cakes.

Now I cut off another circle and started the process again.


IMG_9262.cake

Do this to both cakes.

Then cut off another circle so you are left with the center portion. (FYI, if you want to do another circle, therefore making your center smaller, you certainly can!)


IMG_9270.cake

You are now left with two cakes that have concentric circles cut in each.

IMG_9271.cakes

The next step might go against everything you know about cake… but just do it anyway.

Wow that was bossy.


IMG_9277.cake

Take a nice big sharp knife and cut from the OUTSIDE of the center circle through the cake.


IMG_9288.cake

You are going to gently separate the layers into individual sections. This is why it is SO important to have a very chilled if not frozen cake!


IMG_9295.cake

Choose which centeryou want to start with. (I choose the white cake)


IMG_9297.cake

Take the next larger layer of the other cake and place it around the center.


IMG_9301.cake

Keep doing this… alternating the layers… until you have a complete cake assembled again!


IMG_9304.cake

And there you go! Easy right?

Now… were you worried about the layers not staying together? I fixed that with three easy steps.

1. Pour a simple syrup over the re-assembled cakes. (not too much!!)

2. Place a wax paper "belt" around the cake and bind it together with a cord or towel scrap.

3. Place it back in the freezer for a bit!

A couple hours before you are ready to decorate, place the cakes in the fridge so they can "thaw" without sweating.

(I wouldnt recommend decorating a frozen cake.)


IMG_9305.cake

Now… please forgive me but I didn't decorate the outside with the roses.

I just did a smooth layer of frosting then wrote out a romantic quote I found from Shakespeare.

Its nothing fancy, but it was easy. You weren't here for the outside right?


IMG_9571.stamp

"When I saw you I fell in love, and you smiled because you knew."

And there are the vertical layers!

If you make this cake please let me know, I would love to see! And of course, love to know if you came up with an easier way.


:)