Showing posts with label How To (Step by Step). Show all posts

Sunday, August 30, 2020

•*¨*•.¸¸⊰✿¸ © Cara2 Membuat Sambal Tumis Ikan Parang Sempoi Ezy Pezy Yum...


salam gaiss, idea masak yg sempoi ujung minggu ni ya ... slmt hari merdeka yg 63th, syukur alhamdlillah Malaysia still aman damai lagi .. kita doakan pemimpin yg suka mkn duit rakyat tu dibuka pintu hati jgn mkn duit cucu-cicit kita nnt ...bungkus mesia ni hehehe ... #pesananpenaja jek ...


Music: Sunny
Musician: @iksonmusic
Link : https://youtu.be/ZxaLNJaJLbE

 
-------------------------------------------------------------------------------------------------------------------------------------------------------------
•*¨*•.¸¸⊰✿¸ © Cara2 Membuat Sambal Tumis Ikan Parang Sempoi Ezy Pezy Yummy .. InsyaAllah •*¨*•.¸¸⊰✿¸
--------------------------------------------------------------------------------------------------------------------------------------------------------------

source : warisan bonda
edited by : callmemissrose@roseslicious

-----------------------------
/* Bahan2Nya :-   */
------------------------------

   
⊰✿ 3 - 4 potong ikan parang - boleh gantikan dengan ikan tenggiri/gelama/jenahak or such, seafood pun boleh ..
   
⊰✿ 1 biji bawang besar dipotong bulat
   
⊰✿ 2 sdb air asam jawa
   
⊰✿ garam dan serbuk perasa
   
⊰✿ 3 sdb minyak masak


--------------------------------
/*  Bahan Dikisar :-  */
--------------------------------

    ⊰✿ 10-15 tangkai cili basah or kering
    ⊰✿ 2 biji bawang besar - min skip
    ⊰✿ 2 inci belacan - min skip
    ⊰✿ sdkt minyak tuk menumis
    ⊰✿ sdkt air
•*¨*•.¸¸⊰✿ blend semua bahan sehingga menjadi pes basah


-------------------------------------------
         /* Cara2 MembuatNya :-    */
-------------------------------------------

⊰✿ 1-goreng ikan
•*¨*•.¸¸⊰✿ nak dptkan ikan yg wangi & garing kita goreng ngan daun pandan + daun kunyit + daun limau + daun kari + sedikit perahan limau or kulit limau ya ..
•*¨*•.¸¸⊰✿ dah garing angkat ...
⊰✿ 2-buat cili paste
•*¨*•.¸¸⊰✿ blend cili + minyak + air putih - boleh jek blend sekali ngan bawang & belacan/
•*¨*•.¸¸⊰✿ panaskan minyak dan tumis bahan blend sehingga garing
⊰✿ 3-combine
•*¨*•.¸¸⊰✿ tumis pes cili smpi garing & terbit minyak, masukkan air asam jawa, leh mskkan air jika perlu. min masukkan sedikit santan nk bg 'kick-off' tp optional la ye ...
•*¨*•.¸¸⊰✿masukkan bawang besar or bahan sampingan lain jika suka ...
•*¨*•.¸¸⊰✿pastu masukkan ikan yg digoreng tadi ...masukkan garam & serbuk perasa and tara ..it's doneeeee


#sambaltumis
#sambalikan
#sambal
#masakapahariini
#makanapahariini
#pelbagaiikan
#callmemissrose
#roseslicious #roselicious
#redroses2u
#ezypezyyummy
#laukpaukmelayu
#laukpauk
#makantengahari
#laukpauk


Wednesday, August 19, 2020

•*¨*•.¸¸⊰✿¸ © Cara2 Membuat Kon/Cone Apam Cornetto Yang Ezy Pezy Yummy@R...


Music: Lay Down Beside You
Musician: Carl Storm

------------------------------------------------------------------------------------------------------------------------------------------------------------------------------
•*¨*•.¸¸⊰✿¸ © Cara2 Membuat Kon/Cone Apam Cornetto Yang Ezy Pezy Yummy@RosesLicious .. InsyaAllah •*¨*•.¸¸⊰✿¸
-----------------------------------------------------------------------------------------------------------------------------------------------------------------------------

Source : azlita masam manis
Edited By : callmemissrose@roseslicious

----------------------------------------------------------------
•*¨*•.¸¸⊰✿¸ © Bahan2Nya : •*¨*•.¸¸⊰✿¸
-----------------------------------------------------------------
⊰✿ Beberapa helai kertas nasi lemak/kertas burger or kertas minyak
⊰✿ Gunting
⊰✿ Pisau
⊰✿ Stapler or selotep or any glue agent (tp selotep x logik gek sbb kita nk steam up, nnt terbukak plaks heee )

----------------------------------------------------------------
•*¨*•.¸¸⊰✿¸ © Cara2 MembuatNya : •*¨*•.¸¸⊰✿¸
-----------------------------------------------------------------
1. Bahan yang kita perlukan ialah kertas bungkus nasi lemak atau kertas burger atau kertas minyak. Pisau, gunting dan solotape.
2. Ambil sekeping kertas burger ukuran standard
3. Lipat kertas membentuk segitiga memanjang dan potong 2 ngan pisau/cutter/gunting
4. Lipat 2 lagi & potong gik ..
6. Lipat 2 lagik tuntuk membentuk line2 di tengah mcm divider gittew, kali ni jgn potong plaks ... takkan kecik bebenor konnya hihi ..
7. Kira 3 kali lipat but 2x potong gittew..pepaham x anak murid?? ..
8. Pegang kertas dalam kedudukan video & try to make swirl, dpt 1 pusingan lengkap consider dah dpt kon lettew ...
9. NI ayat cik azlita -- >> Tarik hujung segitiga biarkan ia selari dengan hujung yang satu lagi. Sebelah tangan pegang pada sebelah bawah kon. Dan sebelah tangan lagi pegang di sebelah atas kon dan terus mengulung.
10. nak senang ciked tgk jek bideo atas tu hah ..lg sonang ..ezy pezy ...
11. Taraaaa ...dah siap, leh letak batter apam & start steam up ... Selamat Mencuba & Semoga Bermanfaat ...

----------------------------------------------------------------
•*¨*•.¸¸⊰✿¸ © The End •*¨*•.¸¸⊰✿¸
-----------------------------------------------------------------
NOTE : Cara2 Membuat Apam Cornetto boleh click here --> https://www.youtube.com/watch?v=5c7wIr640Pk

Saturday, May 28, 2016

•*¨*•.¸¸❥¸ © Swirl Chocolate Chips Cupcakes •*¨*•.¸¸❥¸ ©


N3 kali ni sy tunjukkan cara2 membuat sponge cupcakes using the sponge mix ready yg available kat bakery supplier ya. Dah lama x baking skills mmg dah lari dan bterabur ...Swirl pun x cantik mana ..huhu ...Sy blame set mixer sy yg rosak heheheh ... Ok jom layan ...InsyaAllah ada manfaatya ...Dan semoga all mommies outta pndi masak ...anak hepi cik somi pun poja-poji ... PJK (perut jalan ke depan) kot lg nnt ...


Kita mulakan dengan membuat cupcakes :-


Bahan2nya :
--------------
  • 250 gm sponge mix (vanilla/chocolate or any flavour as u desire)
  • 5 biji telur gred A
  • 60ml air masak suhu sederhana (if nak letak perasa like pandan, put with this boiled water)
  • 60ml corn oil or butter - i used butter, melted
  • 1/2 tsp ovelette
  • 1 tsp bicarbonat soda
  • 1 tsp baking powder
  • 1 tsp vanilla essence


Method  to bake !
--------------------------
  • Pic 1 - Pastikan mixer and mixer bowl bersih dr segala kekotoran dan grease sbb akan mempengaruhi 'kegebuan' telur yang akan dipukul nnt.


  • Pic 2 - Pukul telur sampai betul2 kembang (this will takes approximately 15 minutes if using my mixer ! but depends on the mixer jugak - lau ada turbo power lg cepat kot). 
  • MeanWhile, boleh sukat dan ayakkan sponge mix, tuk 5 biji telur sy sukat 250gm tepung, kalau nk buat sikit just guna 3-4 eggs and then 125gm tepung sponge mix jek ..itu lah ratio nya yg selalu sy buat
  • Bahan2 dicampur bersama spongemix yg ialah baking powder 1 sdk + baking soda 1sdk + icing sugar 2-3 sudu besar. All sifted dan kemudian tgk step bawah ni ...
  • Pic 3 - Lepas tu masukkan sponge mix sikit2 sampai habis ...Masukkan ovalette. Pukul lagik another 15 minutes (Trust me! ..I've been tried out for 8mins, 10mins and 15 mins gives me the BEST RESULT though !!, This is by my own experience ok to get the very very delicate status/stage) ..nk reach gebuz gebaz stage. MeanWhile boleh cairkan butter, cara double boiler or panaskan in microwave jek.

  • Pic 4 - Masuk air panas (boiled water, if nak letak perasa like pandan, put bersama this air) sikit2. Masukkan oil or mentega cair, pukul lagik sampai jadi mcm ice cream peak for another 15 mins, jenuh menunggu but worth it when you saw the 'spongy and springy' sponge cake, we called it Ribbon like stage or Ice Cream peak ! 
  • If not mmg kita takkan dapat bakerynya level of softness and smoothness ... lau x spongy baik buat kek coklat lembab ye x??
  • Pic 5 - Perasakan dengan vanilla essence nak bg wangi-wangian ..eh cistat pun nk pki perfume tau !


it should be looks like this for the FINALE stage !


  • Pic 6 - Sy bahagikan adunan kepada 2 - Chocolate & Vanilla flavour ...uols boleh buat perasa & pewarna kegemaran ...nk buat 7 pun sokay !! ...rainbow la sgt kan ? ...tp sokay jek, sweeettttt :-)

  • Pic 7 - Curahkan perasa vanilla ke dalam cupcake mould. Sy gunakan cawan cupcakes keras sbb xde dulang muffin yg lubang2 tu kan. Selang-selikan dengan pewarna coklat. Masukkan Chocolate Nibs in between. Pic mcm kat bawah ya :-
 
  • Pic 8 - Chocolate Nips/Chips ni boleh direplace ngan kismis or anything u like. Ok jek pepe pun will do, janji yummy yummy goes to your tummy ...gitu :). Lapisan terakhir masukkan vanilla layer semula. Panaskan oven 10 mins before. Dah boleh mula bake !

  • Pic 9  - Right after bake, tunggu sejuk sebentar before apply the whipping cream, otherwise whipnya cair gitu .. Sejukkan atas wire rack :)

  • Pic 10 - Pukul Whipping Cream sehingga naik dan warnakan pink conconeal (err adess cam mn spellingnya) aka pink dan kuning telur. Combine both dan masukkan ke dalam bag piping.
  • Pic 11 - Uols boleh tengok video ni cara2 membuat swirl ya. Nak explain x pandai la mokcik ..hehehe, from Emma's Sweets.


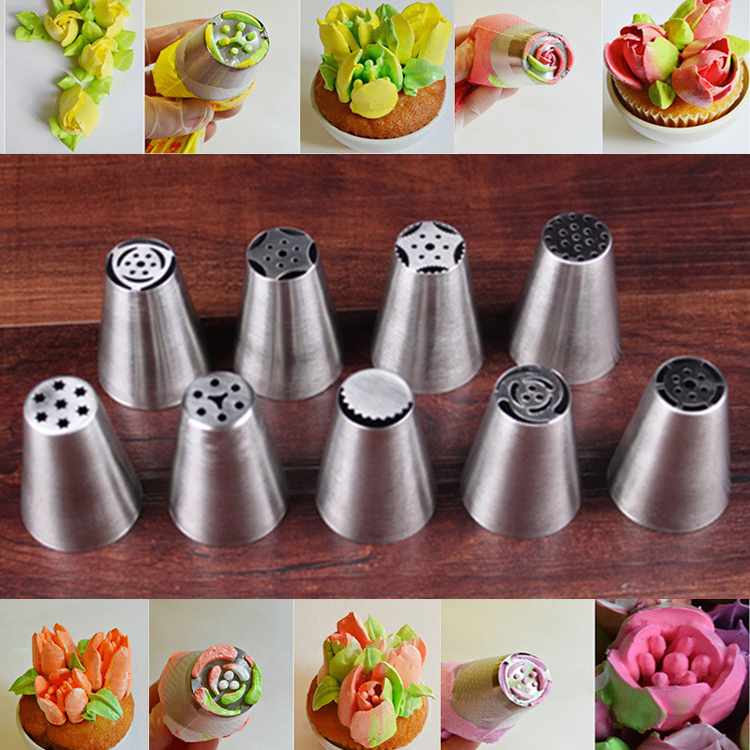
  • Pic 12 - Ok da siap .. boleh la di'ngap' ya ...More details on sponge cake boleh refer N3 kat sini ya. Masa ni lum terjumpa video Russian Tulips lagi ...huhuhu ... Hah cam tulah miss rose x explore ...InsyaAllh coming cupcakes nk apply the Russian Tips/Nozzle ... I like roses ! roses ! ni ... cis perasan  ler tu *wink*
  • Oh ya click link to goes to youtube video ya !! Dan juga Russian Ball Tips/Nozzle


%%% Selamat Mencuba dan Semoga Bermanfaat %%%


Monday, October 26, 2015

╰⊰✿ How To Use Tappits For Cake Decorating V2 ╰⊰✿


Have you ever wondered how the pretty font is made on cake boards and cake plaques? The answer is Tappits , which are cutters that can be used with fondant and gumpaste. I use the Funky Alphabet and Numbers Set by FMM. The tappits are simple to use and take a lot of the guess work out of lettering for cake decorating.


Tools Needed
  • Small Rolling Pin
  • Pizza Cutter
  • Small Paint Brush
  • Fondant or Gumpaste (apa bezanya both ni ? - Fondant digunakan untuk membalut badan kek dan Gumpaste unutk membentuk bunga dan figurine, juga dikenali sebagai sugar paste, pastillage atau candy clay) - boleh refer sini untuk DETAILS
  • Nonstick Surface


I will be using fondant for this tutorial. It helps to put the fondant in the freezer for a few minutes so that it will firm up and will be less stretchy.


  • Roll out fondant to 1/8 of an inch. (1/16 of an inch is good also)
  • Cut however many squares you need for the word that you are trying to make.
  • I will be making the word bake, so only four squares are needed. They don't have to be perfect.


  • Find the letter that you are going to need on your tappit.
  • Press it firmly into the fondant and wiggle it around until the edges start to detach.
  • Carefully pull the edges from the letter.


This is what the lettering should look like when you are done with the steps above.


  • Bend the tappit back slightly and tap it against your nonstick surface.
  • This should release the lettering from the tappit.


There are two options for releasing the insides of the letters. You could:


  • Poke the end of a small paintbrush through the inside of the letter while it is in the tappit.


or


  • Lift the letter up once it is on the nonstick surface and poke the insides out.


Here is what the final product looks like. I hope that you have enjoyed this tutorial and learned something new. Have a great week.


Savor The Baking,


Chineka


This is the one that i'm using :-


Groovy Lower Case Letter Clikstix Cutter Set (gambar atas)

Script Lower Case Letter Clikstix Cutter Set (gambar bawah)


Beberapa penggunaan tappit di dalam kek saya ....i use this one instead, Clikstix Alphabet bestnya dia ada eject part on the bottom part so the huruf tu senang come out ...itu yang besh ! >_<


u may also see the video on youtube
3 - Patchworks Cutters - https://www.youtube.com/watch?v=gFgKbbBYbDU ...x pasti mana nak dptkan ni ...may be uols leh gugel


~* Selamat Mencuba Uols from Miss Rose *~


Wednesday, April 01, 2015

•*¨*•.¸¸❥ SnowFlakes Marble Fruits Cupcake •*¨*•.¸¸❥


< No intro ...speechless Day heheh > ....


...Saya mulakan dengan cara2 membuat sponge cake, yang ni chocolate flavour tapi uols leh buat whatever uols suka ye ....terpulang pada citarasa memasing ...
 

Bahan2nya :
--------------
  • 250 gm sponge mix (vanilla/chocolate or any flavour as u desire) -
    Saya guna 'optima' (mcm kereta plaks) version, optima ni utk buat chiffon or swiss roll, may be texture lebih halus agaknya ...
  • 5 biji telur gred A
  • 60ml air masak suhu sederhana (if nak letak perasa like pandan, put with this boiled water)
  • 60ml corn oil or butter - i used butter, melted
  • 1/2 tsp ovelette
  • 1 tsp bicarbonat soda
  • 1 tsp baking powder
  • 1 tsp vanilla essence
 
  • Mula2 pastikan bowl mixer dan pe'mixer' tu benar2 bersih dari kesan grease or any kotoran sebab nanti terlur x naik menggebu ya!  ... Selepas diperiksa teliti heheh pukul telur sampai betul2 kembang (this will takes approximately 15 minutes if using my mixer ! but depends on the mixer jugak, mine TENSION LEVEL is only 1-2-3, if guna KITCHENAID mcm Martha Stewart selalu guna tu i think 8-10 mins enough kot sbb the TENSION LEVEL is 1-6 !), mine punya National brand zaman dedulu but still mantap u, still awet muda and POWERless tau, hehehe !! ). 
  • Meanwhile menunggu tu bolehlah ayakkan sponge mix + gula icing + baking powder + bicarbonat soda  (even sponge mix mmg dah ada gula but if you sift and then the granule gula tu dah remains, so add up between 2-4 tbsp somemore according to ur sweetness taste level !)
  • Nota kaki tangan : + tambah 10gm serbuk koko kalau nak buat chocolate sponge cake ya tp mmg ada jual sponge mix chocolate cuma sy prefer sbb bkn dr jenis 'optima' ni bkn kereta ye ...nama tepung tu optima !.)


  • Lepas tu masukkan sponge mix sikit2 sampai habis, boleh rendahkan mixer sbb xnak bg tepung tu terpercik (mcm air ke??) ke serata dapur ...Lepas tu masukkan ovalette dan pukul lagik another 15 minutes (Trust me! ..I've been tried out for 8mins, 10mins and 15 mins gives me the BEST RESULT though !!, This is by my own experience ok to get the very very delicate status/stage)
  • Nota kaki tangan : tp jangan lebih 15 mins sbb nanti telur tu dah capai 'penyet' level ...penyet tu maksudnya dah x mengembang lg la. Kerja kita mmg kacau je la ...kuikuikui

  • Cairkan mentega dengan kaedah double boiler sehingga cair, boleh juga gunakan minyak masak tp hasilnya kureng gebu gitu.  Sebelum butter tu uols masukkan masuk air panas (boiled water, if nak letak perasa like pandan, put bersama this air) sikit2. Ten barulah masukkan oil or mentega cair, pukul lagik sampai jadi mcm ice cream peak for another 15 mins, jenuh menunggu but worth it when you saw the 'spongy and springy' sponge cake, we called it Ribbon like stage or Ice Cream peak ! 

  • Pukul lagi adunan selama 15 mins, pada level ni uols masukkan vanilla essence, perasa coklat ke dalam adunan. Panaskan oven at least 10 mins b4 bakar kek. Alaskan baking pan dengan parchment paper (rasanya kertas surih kot in Malay). Selepas itu bakar selama 35-40 mins using the 155 ºC - 160ºC. Ice cream peak yg dimaksudkan seperti gambar di bawah ya ...bkn la mcm ice cream tu ...peak je hahahah

  • Adunan dibahagi kepada 2 - 1 vanilla mixture 1 chocolate flavour k
  •  Gaulkan fruits dengan sedikit tepung supaya the fruits tak mendak ke bawah cupcake bila dimasukkan ke dalam batter nanti, gambar seperti di bawah :-
  • Panaskan oven terdahulu mcm 10 mins or so b4 nak masukkan cuppies ni. 'Prepare'kan dan aturkan cawan cuppies dalam dulang. Saya guna cawan cuppies keras sbb sy xde baking pan yang ada acuan for cuppies tu, susunkan seperti gambar di bawah :- 


  • Curahkan vanilla mixture/adunan ke dalam cawan cuppies, curahkan hanya 1/4 sahaja mixture, Selepas itu masukkan fruits yang telah digaul dengan tepung tadi. Curahkan mixture bewarna coklat plaks. Proses diulangi dengan vanilla mixture kembali. gambar ditunjukkan seperti di bawah :-
 
  • Masukkan ke dalam oven pada suhu 150-160 Celcius selama 15-20 mins je but depends on oven uols la...mine is kecik, so suhu rendah dah ok da ..


  • Right after baked ...tp dia akan dense sedikit ..biasa la sponge cake mmg mcm tu 'pe-el' dia ahaks >_<


  • Selepas itu angkat dan sejukkan di atas 'Wire Rack' ...Gambar seperti di atas uols ...


  • Chocolate Ganache Recipe »

  • .: Ingredients :.
  • - Cooking Chocolate - normal or bittersweet will do
  • - Instant Custard powder - ni la yg bg choc kita sedap tau !!
  • - Susu segar or susu tepung (+ air) sedikit, nak bg cair sedikit
  • - Sedikit Minyak masak - nak bg berkilat, shiny shiny u !
  • .: Method :.
  • Masak cooking chocolate sehingga melted (seperti gambar di bawah ya). Masukkan instant custard powder + susu tepung (bancuh bersama otherwise custard powder tu akan ketul2) sedikit demi sedikit mengikut kadar kelikatan yang uols nak. Selepas itu masukkan minyak masak. Kacau rata dan voila boleh la disalutkan ke cuppies tadik.


  • Step 1 - Cooking Chocolate dipotong kecil supaya senang melted nanti. Step 2 - Gunakan kaedah 'double boiler' untuk memasak Chocolate sbb chocolate senang terbakau *wink again* or 'burn'. Method ditunjukkan seperti gambar di Step 2, ambil periuk dan letakkan air, panaskan sehingga air mendidih and then ambil another pot/mangkuk (sy guna periuk kaca tahan panas ye!, x boleh kaca biasa tu pecah ye) and put periuk tadi (double periuk la ni). Step 3 - Bila air dah mendidih or pinggan dah panas boleh la dimasukkan/letakkan ketulan cooking chocolate tadi, biarkan 'melting' sebentar..selepas itu ..
 
  • Step 4 - Masukkan campuran susu dan serbuk instant custard (dibancuh bersama, that's y sy recommend susu tepung, masukkan air panas otherwise the custard powder akan berketui2s). Step 5 - kacau campuran tadi sehingga sebati dan semuanya cair. Step 6 - Gunakan susu stainless steel ya ...x ingat reason plaks reason y .. kenapa ye? ...nnt sy gugel and paste it here some other time.... InsyaAllah ..but rerasanya utk pengaliran haba yg baik kot ...


  • Step 7 - Masukkan minyak sayuran/butter/minyak masak ke dalam campuran tadi. Tujuan supaya cooking chocolate tadi menjadi 'shiny shining' gitu hah. Step 8 - keep on kacau, keje kita mmg mengacau je kiranya kukuikui ..jgn mind or jiwa kacau udah ler...tu mmg haru biru . Step 9 - Taraaaa...boleh la digunakan ke atas kek sebagai ganache or for biskut or tis tiramisu.


  • How to Whip Whipping Cream »

  • .: Ingredients :.
  • *** Any Non Diary Whipping Cream - i opt for Rich's Gold Label due to the yummylicious mcm ice cream.
  • *** Mixer & mixer bowl 
  • *** Vanilla Essence - optional
  • *** Sedikit gelatine - optional, kalau nak stabilkan whipping cth nak frost kek tp dlm kes ni x perlu
  • *** Pewarna ikut suka 


  • Saya ajar nak prepare Whipping Cream dulu ya secara ringkas ..kalau nak details boleh refer this link (Whipping Cream).
  • Saya prefer Rich's Gold Label sbb rasanya menyamai ice cream uols ...but uols pilih la which ever suits your taste and budget ya sbb Gold Label mmg mahal sikit compare others. Rabak pockets jugak la ...Letakkan kat freezer bawah dahulu before guna whipping cream ni ya ..If not guna simpan kat tpt beku tu ...
  • Memula letakkan bowl n mixer ke dalam freezer selama 10-15 mins or so nak bg sejuk.
  • Curahkan liquid ikut yang kita nak guna, sellaunya 1/5 (eh 1/4 aka suku bowl)je mangkuk tu sbb nanti ia akan mengembang. Putarkan sehingga naik menggebu.
  • Nota kaki tangan : boleh letakkan bowl dalam ais kalau cuaca panas or kita x put in freezer dahulu selama 10-15 minits.

  • Putarkan sehingga mencapai ice cream peaks, may be amik masa dalam 5-7 minits gitu kot. Selepas tu warna kan ikut suka uols >_< . Ice cream peak tu boleh tgk seperti gambar di bawah ya ...maksudnya bila kita terbalikkan bowl tu the whip tu x jatuh ...hah gitu la ...
  • Untuk kestabilan sejagat kuikuikui ..boleh masukkan gelatin (dicairkan dengan memasukkan air panas dan buat double boiler or boleh masukkan dlm microwave lg senang). So nanti xde la cair sgt bila nak coated the cair (eh apa aku typing ni ...the cake la).
 

  • Coated the cupcake surface ngan cooking chocolate tadik. Putar2kan nak bg dia even all around the edges... macam gambar di bawah. 


~* Semoga Bermanfaat & Selamat Mencuba Uols *~